Saturday, August 25, 2012

Before and After Copic Class

After taking the Intermediate Copic class, I wanted to compare an image I colored before and after the class to see if I was able to achieve a deeper, more dimensional image. I chose the birthday girl from Saturated Canary. Here's the original card I posted (original blog post):


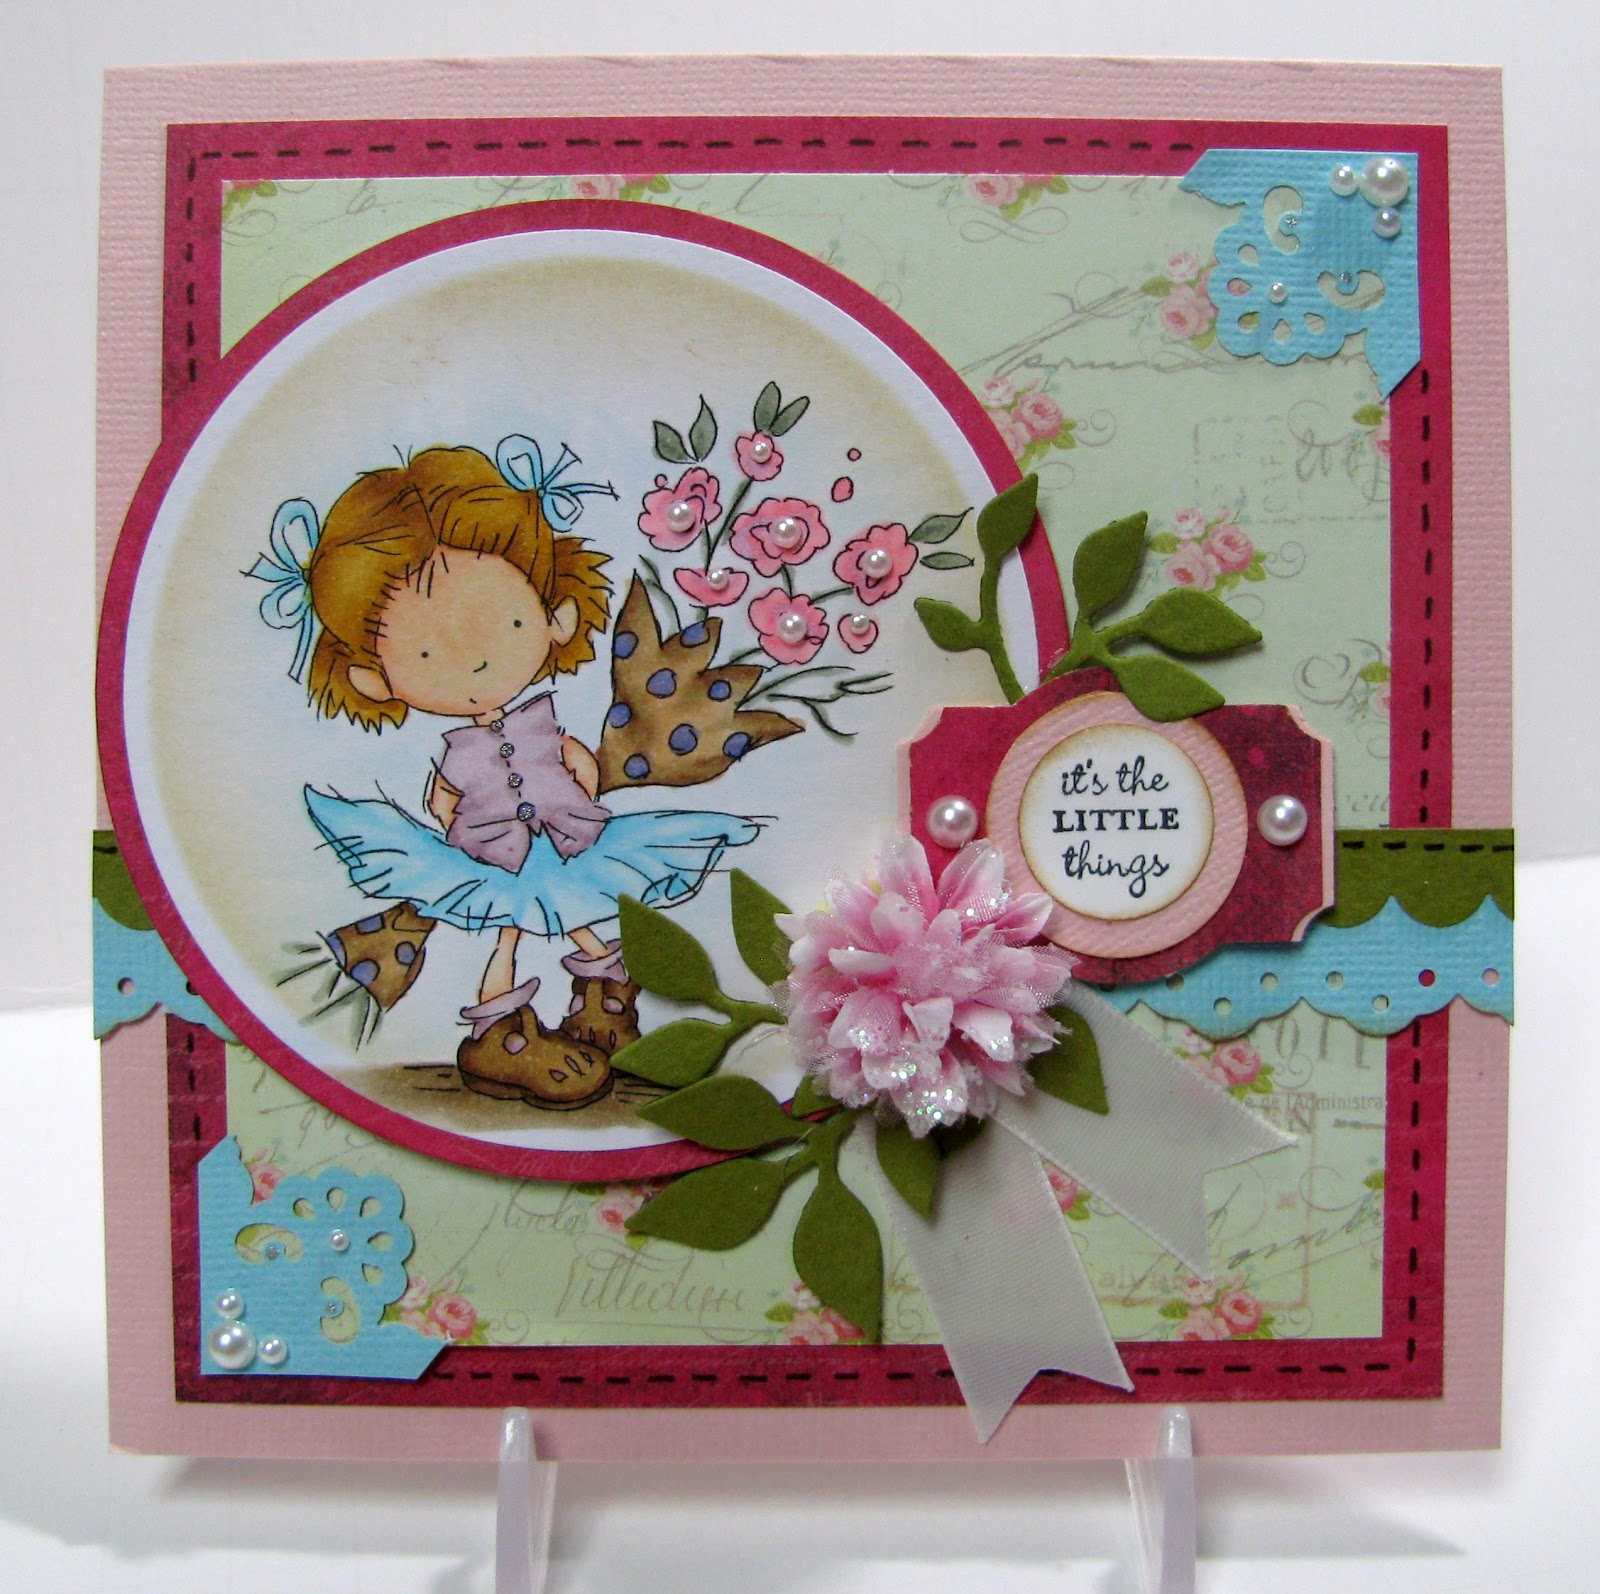
I like the colors on this image and I still think it works well with the theme of this card, but I wanted to try and add some depth.

Here's the image I colored today (realized after I posted I forgot to color her tongue, geez.):


I can't say this image is "better" than the first, but it definitely has more depth, especially in the skirt and ribbon. I still have lots to learn (#1, don't be afraid to grab the darker markers), but I'll get there.


And yes, I used all of these markers to color this image.


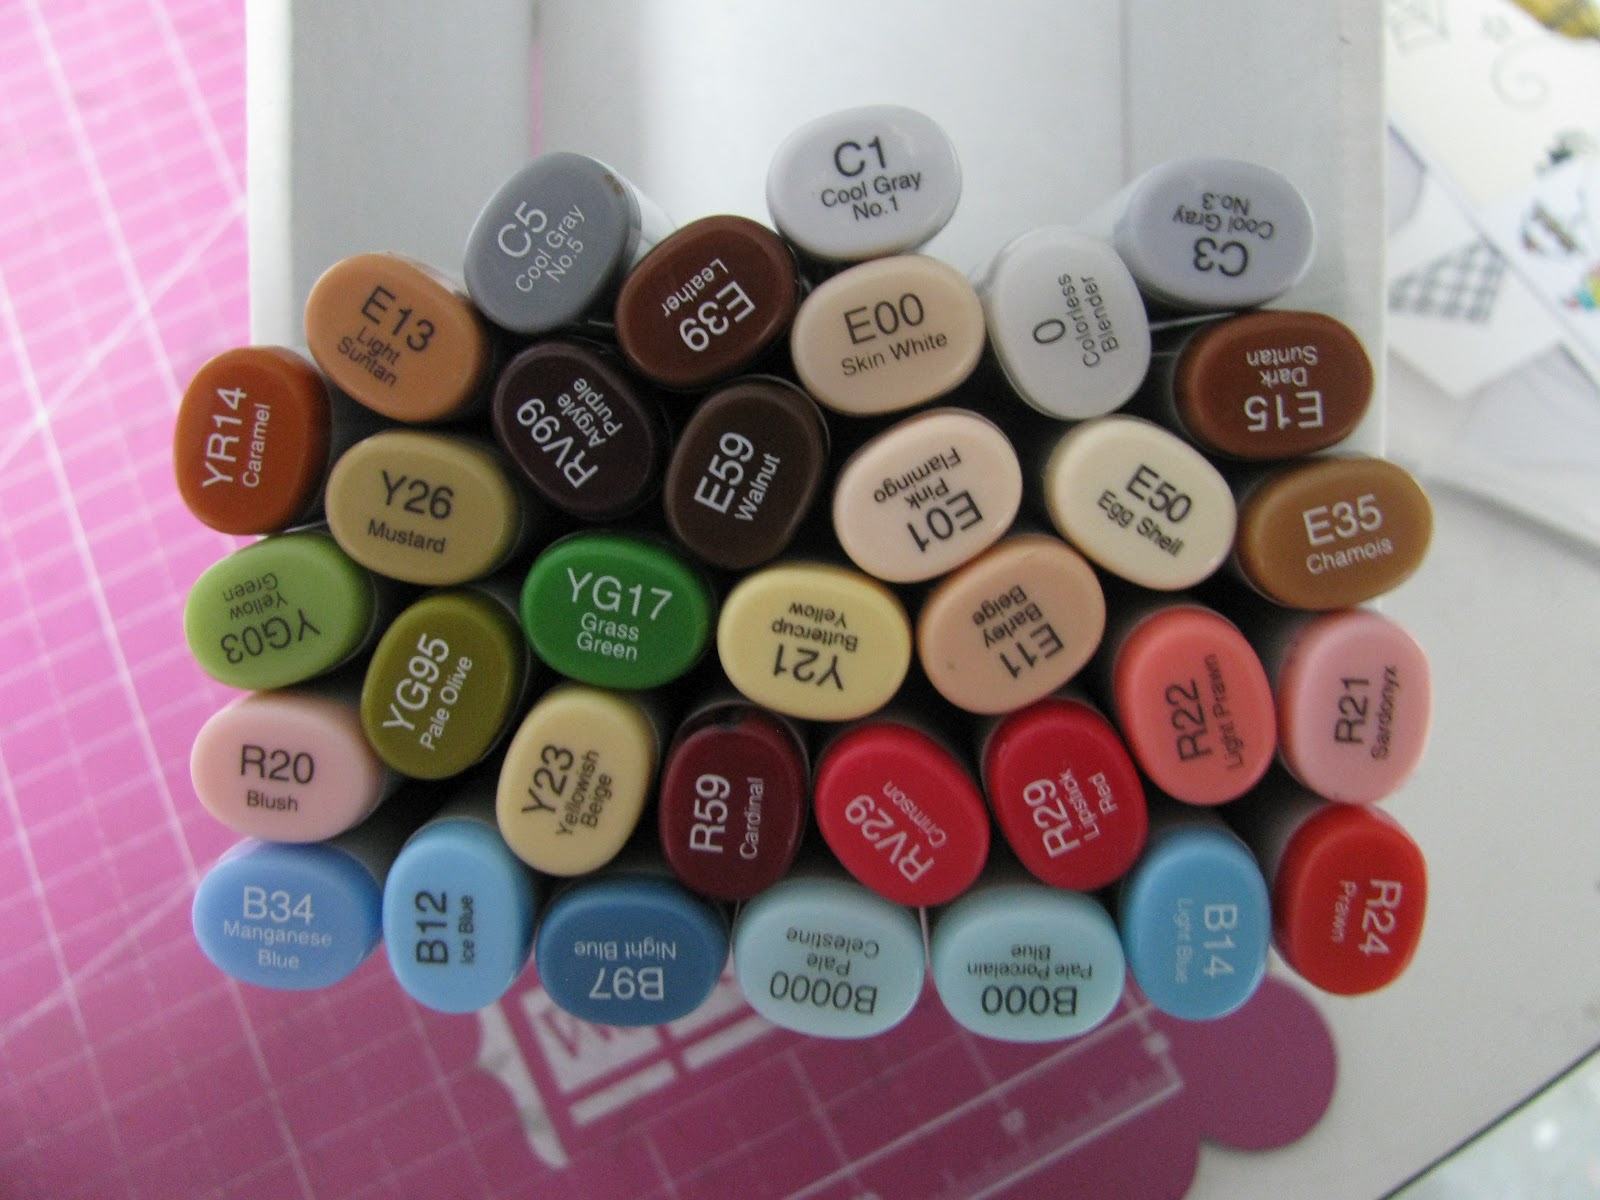
If I had to pick one item out of my craft room I love the most, it would have to be my Copics. They are my "precious."

Don't forget to visit my Etsy shop (link at the top of the page).

Thanks for stopping by and happy crafting coloring.

Dana Desmond

Etsy shop? Yes, please.

Just a quick note to announce...

I've opened my Etsy shop.

I started with a few items, but plan to add tons more. You can find my shop at: etsy.com/shop/DDesmondCreations

Thanks for stopping by. Hope you enjoy my shop.
Dana Desmond

Wednesday, August 15, 2012

Cool Technique: Colored Embossing Powder

While cleaning my craft area, I came across a whole bunch of colored embossing powder. This powder has been in my stash so long I can't even tell the manufacturer. I decided if I don't use, I'm tossing it. So, one last try to see if I could find a use for it. (I will be entering this card in the Simon Says Stamp & Show Challenge: Favorite Technique. http://simonsaysstampandshow.blogspot.com/2012/08/challenge-favorite-technique.html)


I used blue embossing powder to stamp this flower image from Stampin' Up onto patterned paper from Lawn Fawn's Bright Side Petite Paper Pack. I carefully colored it with a couple of Copic markers (coloring over colored embossing can ruin your markers if you aren't careful.)


I punched the image with the coordinating punch from Stampin' Up. The center of the flower was stamped on a different colored pattern paper, punched with a 3/4 in. circle punch, popped up with a dimensional and added a blue gem to the center.


I'm so glad I tried this technique. I will definitely try this again. I LOVE the results.  (All the patterned papers are from one of my Simon Says Stamp Monthly Card Kits. I believe it is from Lawn Fawn's Bright Side Petite Paper Pack.)

I'm heading to Kansas City, MO this weekend to take the Intermediate Copic Coloring class. I'm so excited. I'm hoping to learn some new and fun techniques. My plan is to start offering class in my area. I've had a few people ask me for lessonss and up to this point, I didn't feel qualified to teach. Maybe I will feel more confident after the class.

Thanks for stopping by and happy crafting,
Dana Desmond

Monday, August 6, 2012

It's the Little Things

UPDATE: I found the original packaging for this image set. It is from Lily of the Valley. There are about 15 cute images and I plan to color and create with each and every one.

This image was in a package of images I received years ago in a magazine I ordered. Unfortunately, I can't remember the artist or the magazine they came in. I do remember it was a UK publication.


The image is printed on lightweight cardstock, so I very carefully colored it with my Copic markers. I held my breath the entire time, afraid it was going to bleed, but it worked.


The sentiment, punch and pearls are from Stampin' Up. The flower is from Prima and the leaves were cut with a Sizzix die.


Thanks for stopping by and happy crafting,
Dana Desmon

Sunday, August 5, 2012

Buzzing by to Say Hi!

I have to admit, this is not an image I would have purchased for myself. Not that I don't like the it, but because I would be afraid I wouldn't know what to do with it. However, AllThatScraps.com was giving away this Mashi's Muffins Bumble Bella Rubber Stamp. Of course, you can't pass up free stuff, so I entered. Boy am I glad I did. If I hadn't won, I wouldn't have gotten to play with such an awesome image.


The background stamp is from My Mind's Eye, Indie Chic collection. I stamped the Bella image with Memento Tuxedo Black ink and colored Miss Bella and her friend with Copic Markers. I added Glossy Accents to her eyes and Sakura glitter pen in stardust to her wings.


Since I didn't have a sentiment that would go with this image, I "built" one using Studio G letter stamps. The letters are red rubber and I knew there was no way I would get the letters straight, so I didn't even try. I love the results.


I hope you enjoy this card as much as I did making it.

Thanks for stopping by and happy crafting,
Dana Desmond

Saturday, August 4, 2012

Party Hardy Birthday Card-Copic Coloring

Today's card is a birthday card using a digi image from from the saturated-canary.myshopify.com.
I cut all paper with a new Stampin' Up Framelit die set. Using Copic Markers, I colored the image using bright primary colors. The papers are from one of my Simon Says Stamp Card Kits. Unfortunately, I combined all the papers from each kit and now I can't tell which goes with which kit. I looked on their website and I think these are from Basic Grey.


The flowers are from Prima.


I added a little sparkle to the yellow ribbon with my Sakura Stardust gel pen.

I still need LOTs of practice with my Copics. I'm scheduled to take the intermediate Copic class in a couple of weeks. Maybe I can learn a few techniques that will make my images pop.

Thanks for stopping by and happy crafting,
Dana Desmond